Recipes

bread roll for my go to summer lunches

My Go-To Summer Lunches

Hi everyone, I am super excited to link up with Shay and Erika for today’s “Let’s Look” Post where the topic for this month is My go-to Summer lunches. It’s Winter here in Sydney at the moment but I still have a whole lot of yummy go-to Summer lunches that I really wanted to share with you even though I am freezing cold as I type this Brrrrr!! Salads Of Course! During the Summer months, whether I’m at work or at home I eat salad for lunch almost every day. Most of the time I jazz up my salads with a can of tuna, boiled egg, or chicken. My favourite type of salad is a good old Greek salad full of crunchy cucumbers, lettuce, tomato, and generous handfuls of olives and feta cheese. Yum!! But of course, any salad with crunch makes me happy. I have recently started buying shredded carrots and washed lettuce. So easy to throw together a quick salad with these. Quiche During Summer I like to make an easy quiche that usually lasts a couple of days for lunches. I can take a slice to work and my son can take a nice big slice to school in his lunchbox. So easy, delicious and healthy!! Spinach Pie This spinach pie is just delicious and is always a favourite in my house. You can eat it hot or cold and it will still taste great either way. Spinach pie is great to pack for a fun Summer picnic or it makes a great lunch when you are spending a day by the pool. Everyone is always hungry after a big swim and this pie hits the spot! Turkey Burgers My family prefers a turkey burger over a beef burger. If you use turkey mince instead of beef, your burgers are just so much juicer. I like to make a batch of turkey patties for burgers and they are definitely on the list of my go-to Summer lunches. Tuna Patties These tuna patties are perfect with any salad but my family especially likes to eat them with potato salad. They are neither too heavy nor too light. If you make a big batch they are just delicious for an easy summer lunch that you can eat over a couple of days or even freeze for another time. We sometimes like to eat them in a sandwich as an alternative to other lunch meats. They are also a fantastic healthy snack as your kids can just grab them out of the fridge whenever they are hungry. These taste great warm or cold. Hummus If you’re looking for a lighter Summer lunch option then I really recommend this delicious and easy hummus recipe. Long hot Summer days sometimes mean that you might not really feel like a heavy lunch. On days like this, I like to cut up some fresh crisp veggies like carrots, cucumber, and capsicum to dip into my hummus. So easy, and sometimes I will also add some multigrain rice crackers too. Good Old Bread Rolls We have a great bakery not too far from where we live and they sell amazing bread rolls. During the Summer holidays, I will sometimes go and grab a few for lunch. When I get home I will fill them with all sorts of different fillings. It will usually depend on what I have in the fridge. On most days I just fill these crispy bread rolls with ham, cheese, pickles,  salad, a nice dollop of mayonnaise, and serve it with a side of corn chips. Yum! Keeping Things Simple Summer days mean that the last thing that I want to do is spend a long time in the kitchen. So I will usually make something that will last for a couple of days. I have a teenage son who is always hungry so I like to make sure that there is something substantial available for lunch in the fridge. Things like spinach pie, tuna patties, and quiche are so easy and best of all they keep everyone fed and happy. Happy Summer friends, all the way from wintry Sydney!  

My Go-To Summer Lunches Read More »

tuna patties

Tuna Patties Recipe

Tuna patties are a simple and economical classic to make. They are perfect when you are running low on time yet still want to make something healthy to eat. The main ingredients you need for tuna patties are canned tuna, eggs, flour, and chives. They are so delicious that without a doubt, this very simple Tuna Patties recipe is sure to become a favourite with your family. Tuna Patties Are Great For Children’s School Lunchboxes Tuna patties can be served cold and they will still taste great. So they will always make a really fantastic addition to any healthy school lunch box. You can easily include them as a snack or add them to your children’s sandwiches with lettuce and mayonnaise. Certainly, tuna patties make a nice change from the usual cold meat fillings. Furthermore, they are a much healthier choice, because they don’t contain any of the usual preservatives and salt content that you will find in sandwich meats such as ham and salami. Perfect For Dinner When I hit one of those days where I have no clue what to make for dinner, tuna patties are my go-to dish. The reason for this is because I usually have all the ingredients on hand and they take very little time to make. Tuna Patties Are Healthy And Economical All you need is one big 425g of tuna to make about 10-12 tuna patties. Undoubtedly, this makes it a very inexpensive choice of protein. In addition, tuna is also an excellent source of vitaminB12 and it contains omega-3 fatty acids which are very beneficial for the health of your heart. Recipe For Tuna Patties Ingredients Large (425g) canned tuna. You can use tuna in springwater but tuna in olive oil tastes better 4 eggs separated 1 tablespoon chives 1-2 teaspoons salt 1 teaspoon white pepper 1/4 cup flour Oil for frying. I prefer to use rice bran oil Method In a large bowl whip the egg whites until soft peaks form Add the tuna, chives, yolks, salt, pepper, and flour and mix until combined Heat the oil in a large frypan. With a large spoon scoop out patties into the frypan. cook for approximately 3 minutes until golden brown then turn. continue to cook for a further 2-3 minutes until the underside is brown. Continue cooking the remaining batter What To Serve With Tuna Patties Garden salad Rice Potato salad Sweet potato fries Broccoli salad Potato fries Coleslaw Quinoa and vegetables Separate eggs and beat egg whites until soft peaks form. Mix tuna, flour, yolks, chives, salt, and pepper to the egg whites. Fry tuna patties in batches and drain on a paper towel Enjoy!      

Tuna Patties Recipe Read More »

cooked easy pumpkin risotto

Easy Pumpkin Risotto Recipe

Easy Pumpkin Risotto Recipe–  This easy and very delicious pumpkin risotto recipe is sure to be a hit as a main meal with your family or dinner guests at your next dinner party. It would also make a delicious side dish too! With Thanksgiving coming up so soon this recipe is sure to add a little extra zing to your Thanksgiving menu! As it’s a little different from other regular sides and also a bit fancy. I must admit that when it comes to cooking risotto I usually feel a little less than confident. But if you follow this easy recipe and remember a few simple tips. You will end up with a great dish that will be sure to become a favourite. This easy pumpkin risotto got a double thumbs up from my family and my mother even loved it. She was an amazing cook in her heyday and she is a really tough critic! Pumpkin Is Good For You Pumpkin also has so many great health benefits too because it’s packed with nutrients. So adding some into your diet in creative ways is a great idea! Pumpkin contains beta carotene which is a powerful antioxidant Fiber, potassium, and vitamin C that is found in pumpkin is great for the health of your heart Vitamin C, Vitamin E, and beta carotene that is found in pumpkin will benefit the health of your eyes. Pumpkin is a great source of fiber These are just a few of the nutrients that are found in pumpkins. With so many health benefits it’s a great idea to find ways to incorporate some into your weekly menu. Easy Pumpkin Risotto Recipe Ingredients 250g – 300g pumpkin 1 tbsp olive oil 1 large onion chopped salt and pepper to taste 2 cloves garlic crushed 1 ½ cups Arborio rice ⅓ cup white wine 4 cups chicken stock 1 cup of cooked pumpkin 3/4 cup Parmesan cheese grated Fresh parsley Instructions Cut pumpkin into medium-sized cubes and cook in boiling water. Then once it is cooked set aside In a large frypan add olive oil and cook chopped onion and crushed garlic. Cook until the onion is slightly translucent. Add rice and cook stirring often for approximately 1 minute.  Add the wine and ½ to 1 cup chicken stock and stir. Cook until liquid is almost all absorbed, remember to stir constantly. Continue until the stock is fully absorbed. Repeat this process until there’s no stock left and the rice is fully cooked. Stir the cooked pumpkin cubes through the rice add the parmesan cheese, and continue to cook until the pumpkin is heated through. Remove from heat and serve immediately. Garnish with more parmesan cheese and chopped parsley. Recipe Notes Make sure to add the stock one cup at a time Stir consistently Serve your risotto straight away. If you prefer you could mash the pumpkin and then stir it into the risotto. I prefer cubes because to me it looks better when it is served. Other Recipes If you are looking for other sides, why not try this recipe for easy and creamy mashed potatoes. References https://www.medicalnewstoday.com/articles/279610#nutrition    

Easy Pumpkin Risotto Recipe Read More »

cooked pinwheels

Easy Pinwheels Recipe

This super easy pinwheels recipe will be sure to be a big hit with your kids. You only need two ingredients and any toppings you fancy! Plus you can pop them in the freezer too as they freeze really well. Packing sandwiches all the time can become a bit boring, these delicious pinwheels will be sure to bring a smile to your children’s faces when they open up their lunchboxes. When kids come home from school and they burst through the door, they are usually starving. These pinwheels will satisfy that afterschool starvation and keep them happy until dinner time. Have A Go At Making This Easy Pinwheels Recipe With Your Kids Cooking with your kids is so much fun for them and it has many amazing learning benefits too. So if you are looking for a simple recipe, then this easy pinwheels recipe is perfect. It’s not at all complicated and the kids will love getting their hands into the dough and helping you roll it out. They will also have fun choosing the toppings or perhaps even creating their own combinations. In fact, my sweet friend made these with her son, he kindly offered me the recipe and inspired me to do this post! So Many Toppings To Choose From Savoury Pinwheel Toppings Pizza sauce, bacon and grated tasty cheese Shredded ham, Cheese and pizza sauce Spinach, fetta and grated tasty cheese Ham, pineapple, pizza sauce with grated tasty cheese Vegemite and cheese Sweet Pinwheel Toppings Nutella Chocolate spread and banana Grated apple, sugar and cinnamon Sugar and cinnamon Apple sauce and blueberries Recipe For Easy Pinwheels Ingredients 1 cup Greek yoghurt 1 1/2 cups of self-raising flour Extra flour for dusting Instructions Preheat oven to 180 C Line a tray with baking paper and set it aside In a bowl add the self-raising flour and Greek yoghurt. Stir until combined. Knead for several minutes You can sprinkle more flour if the dough feels too wet Make sure your rolling pin and bench is floured and then roll out the dough into a rectangle approximately 1cm thick. Generously add the toppings of your choice Flour your hands and then starting from the top edge carefully roll the dough towards you. Use a sharp knife to slice 1-2cm slices. Gently place the rolls onto the prepared tray and reshape them into a circle if you need to Bake for 15-20 minutes until they are golden Remove from oven and cool for 5 minutes before transferring them onto a cooling rack Notes If you plan on freezing the pinwheels just make sure that they are completely cool first before you pop them into the freezer. Don’t be shy about being generous with the toppings! Enjoy!

Easy Pinwheels Recipe Read More »

fall apart roasted pork leg

Fall Apart Roasted Pork Leg

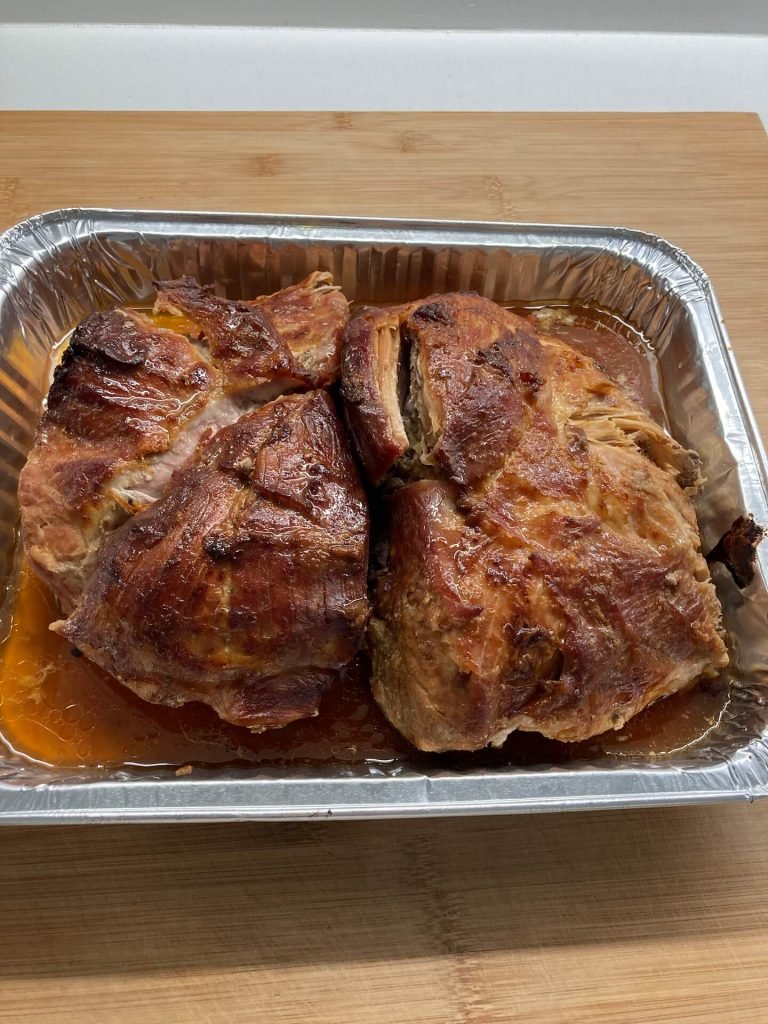
Fall Apart Roasted Pork Leg is sure to be a crowd-pleaser. I was trying to decide what to cook for our Halloween Dinner Party. I wanted a delicious main dish that was easy to cook, and that would feed a small crowd. It had to be something simple so I was as free as possible to enjoy the evening. I was really excited about spending as much time as I could with my family especially since we hadn’t been together since before lockdown. In addition, I was looking for something I could cook in advance and just reheat when the time came. I went through the list of usual crowd favorites like lasagna, nachos, pot roast. Then I thought of pork. Pork is less expensive than other meats and you can easily cook it in advance. Plus it tastes great especially when you cook it until it’s tender and falling apart. How To Cook Fall Apart Roasted Pork Leg In The Oven The key is to preheat the oven to 200 C. Then cook the pork for about 15 minutes at 200 C. Afterwards reduce the temperature to 150 C for the remaining cooking time. I think that the best way to cook fall apart pork in the oven is to use an oven bag.  Oven bags are great because they cut down your cooking time and your meat will be cooked juicy and flavoursome. As an added bonus your oven won’t get dirty with greasy splatters. Pork Shoulder Roast You can also make this recipe using a shoulder roast too. Marinate for Extra Flavour Rubbing the marinade into the pork meat and leaving it for about a minimum of one hour before cooking will ensure that the pork is really succulent. What To Serve With Fall Apart Pork Leg Roast Coleslaw Potato Salad Beetroot, walnut, and rocket salad Rice Roast Vegetables Mashed Potatoes Ingredients pork leg (2.5kg) 2 tablespoons crushed garlic 1 teaspoons salt 1/2 teaspoon pepper 1/2 teaspoon paprika 1/3 cup olive oil Directions In a small bowl combine garlic, salt, pepper, olive oil, and paprika Trim the pork leg of any fat Rub the spices and oil all over the pork, cover loosely with wrap and refrigerate from 1 to 24 hours Preheat oven to 200 C Place the pork into the oven bag and put it into a shallow roasting pan. Roast at 200 C for about 15 to 20 minutes then turn the heat down to 150 C. Cook for approximately 3 -4 hours depending on the size. Pork is cooked once it falls apart easily. Once cooked remove from the oven and let rest for about 20 minutes. Take the pork out of the oven bags. Slice the pork as thin or as thick as you like. Skim the fat off the juices and return the meat to the juices once you have sliced it. Enjoy! Notes If you are cooking for a larger crowd then all you need to do is double the ingredients like I did.

Fall Apart Roasted Pork Leg Read More »

easy quiche

Easy Quiche Recipe

This easy quiche recipe is ideal for those nights when you don’t know what to make for dinner. It’s also perfect as a breakfast dish too! There is no need to make a pastry base from scratch, all you need for this easy recipe is frozen shortcrust pastry. It’s delicious and full of tasty ingredients like bacon, chives, cheese, and baby spinach. But you could just as easily add any other fillings you like. Whatever takes your fancy really. Some Ideas For Quiche Fillings Ham Broccoli Zucchini Bacon and Leek Mushrooms Cherry tomatoes Easy Quiche Recipe Can Be Made Ahead Of  Time The great thing about this easy quiche recipe is that it can be cooked in advance and stored in the fridge for a later time. Just make sure that is fully cooled first before popping it in the fridge. Then warm it up in the oven at 175C, remember to cover it with foil so that the crust doesn’t burn. You can make this easy quiche the night before for breakfast the next day. Alternatively, it can be cooked in the morning and served later for lunch or dinner. What To Serve With Quiche A Leafy Green Salad This side is just right for the warmer Spring or Summer months. Slices Of Fruit Another light warm-weather alternative is to serve quiche with slices of refreshing fruit. Apples and pears make an excellent choice. Chips Or Wedges For a more sustainable lunch or dinner add a side of hot chips or wedges. This is sure to feed a hungry family. Roast Vegetables Another healthy option is to serve quiche with a delicious tray of roast vegetables. Zucchini, eggplant, carrots, and sweet potatoes are excellent choices. Jacket Potatoes Hot and steamy jacket potatoes make an excellent side for cold winter nights. Add sour cream and chives for a complete taste sensation. Easy Quiche Recipe Frozen shortcrust pastry 4 large eggs 3/4 cup milk 1/4 cup cream Cooked bacon diced or strips 1 1/2 cups shredded tasty cheese 1/2 to 3/4 cup of baby spinach 1 tablespoon chives Salt and pepper Instructions Preheat oven to 175 C Press defrosted shortcrust pastry into a 9-inch pie dish. Make sure to cover the sides of the dish with pastry right up to the rim. To do this you may need more than one sheet of defrosted shortcrust pastry Pierce the pastry with a fork multiple times along the bottom, then place a sheet of baking paper over the pastry. Place uncooked rice or dried beans on top of baking paper and blind bake for approximately 10 minutes Remove from oven and set aside Whisk eggs together with milk and cream. Add salt, pepper, and chives Carefully remove the uncooked rice or dried beans along with baking paper from the semi-cooked pastry. Then sprinkle cooked bacon, baby spinach, 1 cup of cheese into the pastry crust. Gently pour the eggs, milk, and cream mixture over the top, and then sprinkle the remaining cheese. Bake for 35-40 minutes Quiche is cooked when the centre is set completely allow to cool for approximately 10 minutes before slicing. Enjoy!

Easy Quiche Recipe Read More »

gingerbread men

Gluten-Free Gingerbread Men Recipe

Yesterday’s post was all about The Benefits Of Cooking With Children.  So today I thought it would be fun to share a simple Gluten-Free Gingerbread Men Recipe that you could easily make with your kids at home. This recipe contains beautiful aromatic spices such as cinnamon, nutmeg, mixed spice, and of course ginger. So you will be able to smell and taste the flavours of all the spices without the ginger dominating. I love the smell of gingerbread men baking in the oven because it reminds me of Christmas. Indeed Christmas is fast approaching and this recipe would make a perfect treat to bake with the kids. I’m sure they would love to leave these delicious Gluten-free Gingerbread men for Santa on Christmas Eve. Along with a glass of milk of course! Gluten-Free Gingerbread Men Ingredients 100 grams softened butter 100 grams brown sugar 50 grams golden syrup or treacle 1 egg 250 grams gluten-free self-raising flour 2 teaspoons ginger 1 teaspoon ground cinnamon 1/2 teaspoon nutmeg 1/4 teaspoon salt 1/2 teaspoon mixed spice 1/2 teaspoon baking powder 250 grams fondant icing 3 tablespoons water Instructions Preheat the oven to 180 C or 350 F Add the butter and sugar into a large mixing bowl. Whisk until light and fluffy with an electric handheld whisk. Add the syrup and egg, continue whisking. Add the rest of the ingredients and whisk until the mixture comes together. knead gently until it forms a dough then wrap in cling wrap and chill for one hour in the fridge. Sprinkle flour onto the work surface then roll out the dough. Use a gingerbread men cookie cutter to cut out the dough. Place the gingerbread men onto a baking tray lined with baking paper. Bake for 15-18 minutes in the oven until golden and firm in the middle. Leave to cool Icing Whisk together the icing sugar and water until smooth. Spoon the icing into a piping bag with a small hole. Pipe eyes, mouth, buttons and any other designs onto the gingerbread men cookies. As another option, you can use Writing Icing Pens to decorate the gingerbread men. These Writing Icing Pens come in a variety of colours and they are very easy to use. Notes When using gluten-free self-raising flour the dough may be a little moist. If this happens then you can just add a bit more flour to the mixture until you have the right consistency. This recipe can also be made with regular self-raising flour. Instead of butter, you can use Nuttelex or lactose-free buttery Enjoy! This delicious gluten-free gingerbread men recipe is sure to be a big hit.  

Gluten-Free Gingerbread Men Recipe Read More »

pancakes

Healthy Pancakes

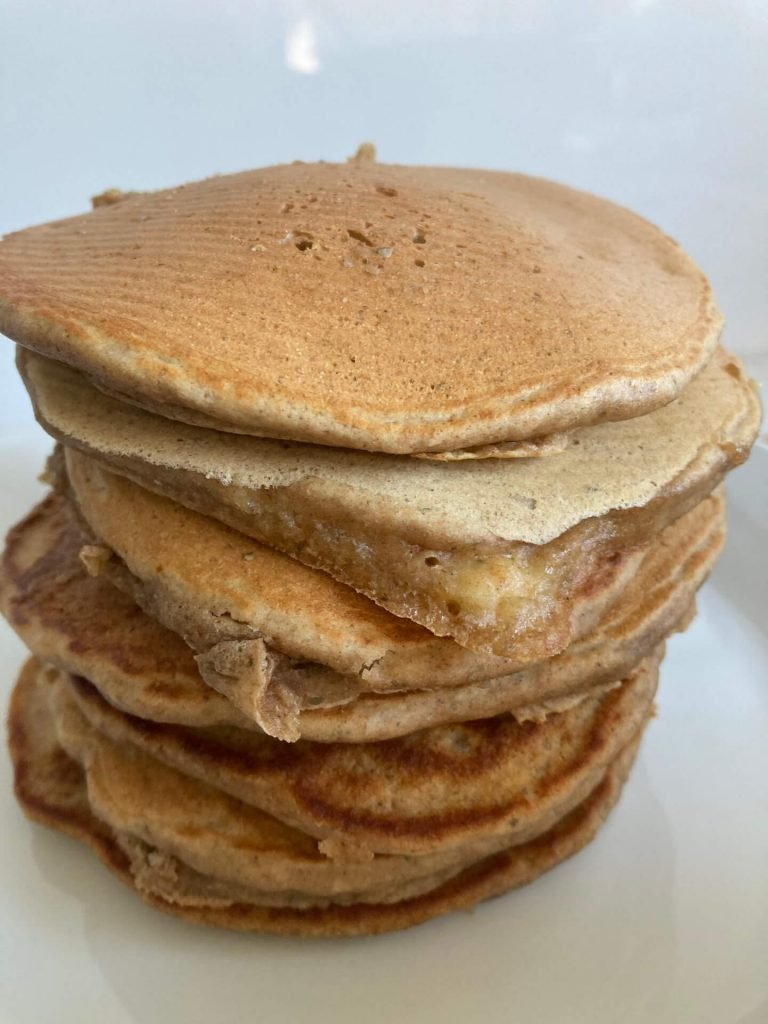
These delicious and healthy pancakes are made with bananas, spelt flour, sunflower seeds and pepitas. Indeed they are not only great to eat for breakfast, but they also make a tasty snack too. You can also add them to your kid’s lunchboxes because they are a fantastic, tasty and nutritious treat. Your kids will thank you!! The mashed banana gives the pancakes a yummy natural sweetness and the ground sunflower seeds and pepitas add extra protein. Therefore this will keep you fuller for longer and you won’t be tempted to snack on empty calories throughout the day. Wholemeal spelt flour contains important nutrients such as iron, magnesium and zinc. It also gives the pancakes a really nice nutty flavour. Another great thing about wholemeal spelt flour is that it is an excellent source of fibre. I like to have the mixture all prepared the night before and stored in the fridge. So all I have to do is cook them in the morning and serve them all nice and hot. You can serve these healthy pancakes with Berries, Greek yoghurt, or Ricotta and of course Natural Maple Syrup or Honey. But you don’t have to add anything if you don’t want to because they are delicious enough to eat on their own.   Healthy Pancakes Ingredients 1/4 cup pepitas 1/4 cup sunflower seeds 2 cups wholemeal spelt flour 2 eggs beaten 2 teaspoons baking powder 1 teaspoon cinnamon 2 tablespoons pure maple syrup or honey 2 cups milk 2 ripe bananas Method Grind pepitas and sunflower seeds in a blender or food processor. Making sure they are finely ground. In a bowl mash bananas and mix together with honey or maple syrup, milk and lightly beaten eggs. Then set aside In another  bowl add the finely ground seeds, flour, baking powder and cinnamon Add the wet ingredients to the dry ingredients and mix them together. Heat a frypan over medium heat and melt butter Pour pancake batter into frypan in round circles Cook for 2-3 minutes on one side. Then turn over and cook for another 1-2 minutes; Serve with your choice of toppings Enjoy!   If you are looking for another healthy breakfast option. Try my delicious  Apple and Berry Gluten-Free Loaf

Healthy Pancakes Read More »

Whipped coffee

Whipped Coffee

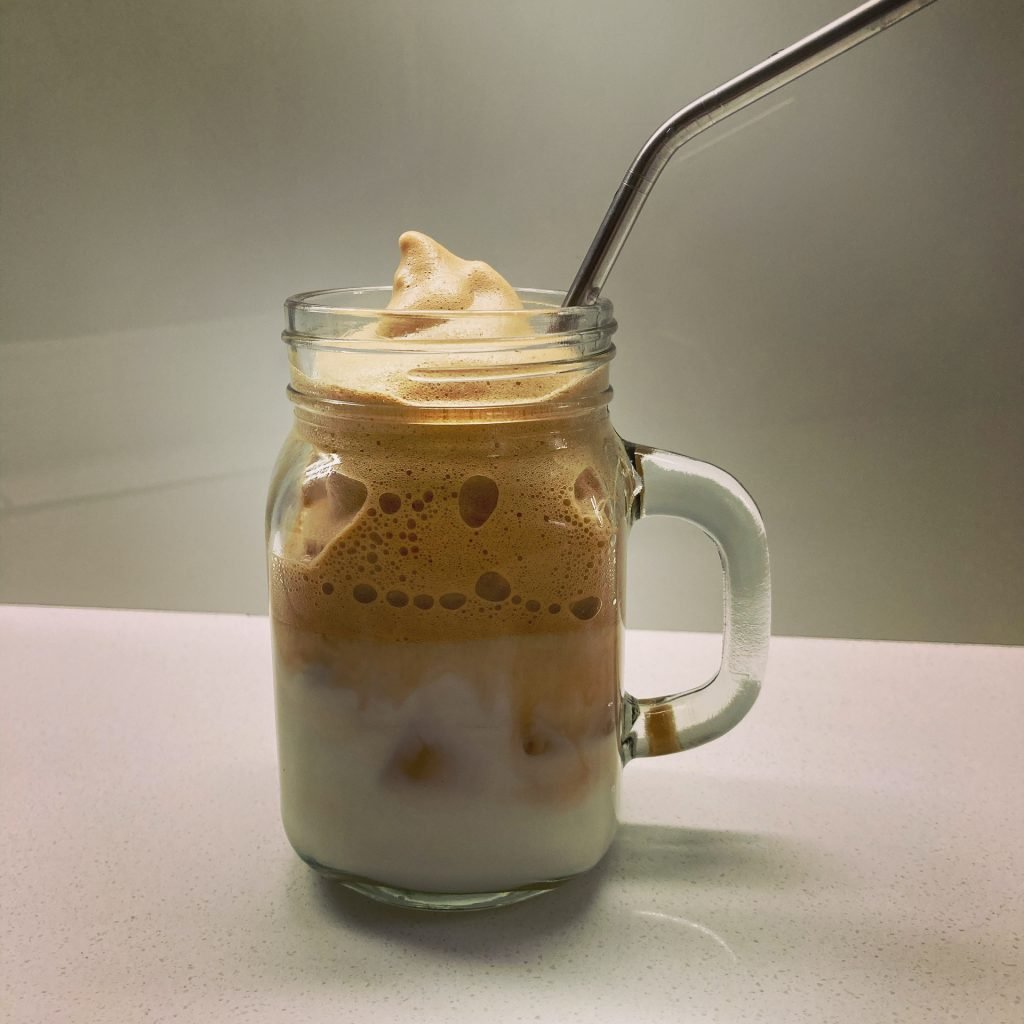
Whipped Coffee was the hot trend last year. I was a bit late to the party because I only discovered it this year! Anyway better late than never right? What Is whipped Coffee? Well, apparently it is called Dalgona coffee in South Korea where it originated from. It became very popular during the lockdown in 2020 and was also known as  ‘quarantine drink’. People in South Korea began posting themselves making their own homemade versions of whipped coffee on YouTube under the hashtag #dalgonacoffeechallenge. It eventually went viral on TikTok and then spread worldwide. It is now the most popular type of coffee that is searched on Google. How Do You Make Whipped Coffee? Probably one of the reasons why it became so popular was because it was so simple to make with ingredients everyone has commonly at home. It takes next to no time, plus you only need instant coffee. It’s almost hard to believe that you don’t need any other complicated coffee, just instant. How good is that? So basically you just whip equal parts instant coffee, sugar, and hot water until you end up with a nice creamy coffee mixture. Easy peasy! Be Careful, It’s Addictive! This coffee drink is so delicious and just right for when the weather is warm like it is at the moment here in Sydney. It tastes like something you would pay a lot of money for at a cafe and it looks really fancy too with all the whipped creamy coffee sitting on top of the milk and ice. I made mine with low-fat milk and it was so good! You can also make it with regular milk too but I thought the low-fat version was better calorie-wise considering it does contain sugar. Speaking of sugar, Whipped Coffee is quite high in sugar.  So I try to only indulge in this as an occasional treat. It is really delicious and refreshing though and it is really nice to have it sometimes and that way it never loses its ‘specialness’. I think there are some sugar-free versions of Whipped Coffee where you add low-carb sweeteners instead of sugar. I might try this one day but for now, I am loving the sugar version of Whipped coffee but only occasionally. Instructions For How To Make Whipped Coffee I used a tall plastic cup and added the instant coffee, sugar, and hot water I bought this electric stick mixer from Kmart a few years ago. This was such a great buy only costing me $29.00. It comes with a variety of attachments and it’s fantastic to use for making this delicious coffee drink. I also use it to make my easy hummus because it comes with a perfect size attachment for puréeing. Whip for about two minutes until it is the right creamy consistency This is the colour it should be and what it should look like. Add Ice together with the cold milk Carefully spoon the creamy coffee on top of the ice and milk. Hmmm yummy and creamy, ready to drink! Ingredients 2 Tablespoons of Instant Coffee 2 Tablespoons of sugar 2 tablespoons of boiling water 1 cup of milk Ice Instructions Add instant coffee, sugar, boiling water in a bowl or tall cup Using a hand mixer whip at high speed for about 2 minutes Add ice to a glass of your choice add milk Spoon the whipped coffee on top of the milk and ice then stir Enjoy! Notes Any type of instant coffee works well. I used the Moccona Barrista Reserve Crema You can use different types of sugar such as granulated, white, brown, or raw If you are looking for a vegan Whipped Coffee option all you need to do is use almond milk, cashew milk, oat milk, or soy milk. The easiest way to make Whipped Coffee is if you use an electric hand mixer or stick mixer like the one I used. But you can also make it by hand using a whisk. Word of warning though, it does take a whole lot longer. If you want more Whipped Coffee all you need to do is increase the ingredients but just make sure to keep the same ratio. Whipped Coffee can also be made as a hot drink, just warm up your milk first then add the coffee mixture over the top!  

Whipped Coffee Read More »

easy and creamy mashed potato

How To Make Easy and Creamy Mashed Potatoes

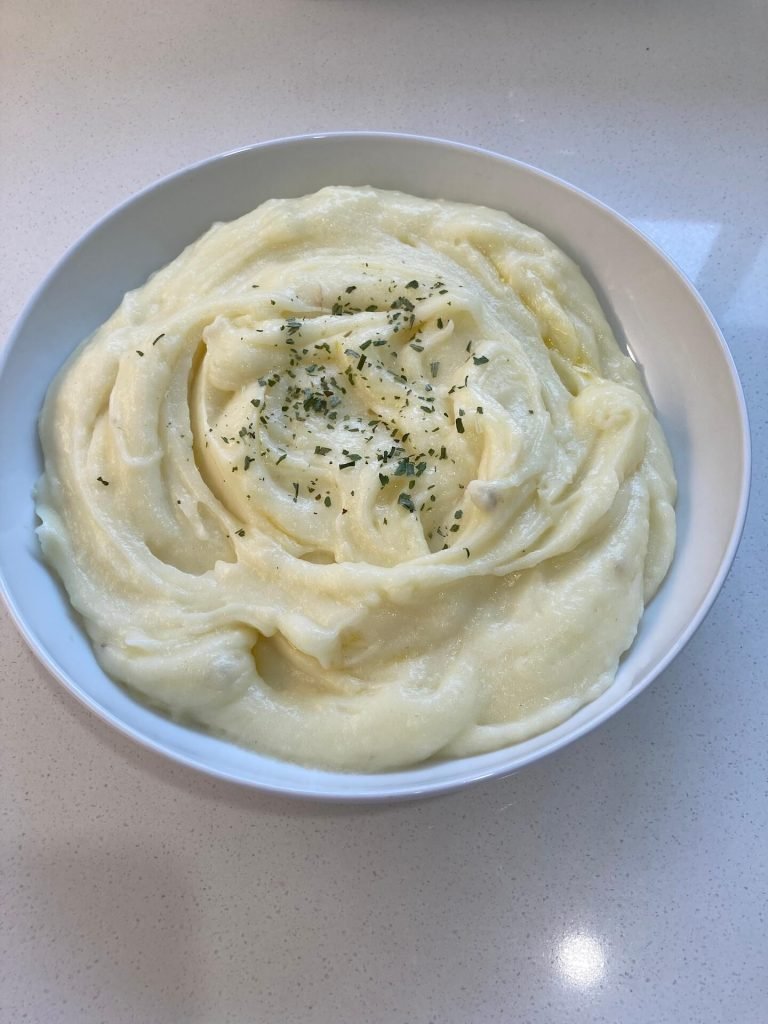
I thought today I would share with you the easiest way I know how to make easy and creamy mashed potatoes. Trust me you will want to throw away that old potato masher for good. If you’re like me and love comfort food, creamy mashed potatoes would have to be at the top of the list. There’s nothing like it is there? It’s the perfect side to so many dishes. Additionally, if you have leftovers there are a ton of things you can do with them. There is literally no excuse for ever having to throw any away. With Autumn/Fall happening in the Northern Hemisphere and Thanksgiving coming soon, this mashed potato recipe will for sure come in handy! So Many Types Of Potatoes I have heard that the best type of potato for mashing is the Yukon Gold with its distinct creamy flavour and yellow flesh. Unfortunately, this variety of potatoes are not readily available here in Australia. So here is a list of other potatoes found in Australia that are also good for making yummy creamy mashed potatoes Russet Potatoes- A large potato with brown skin. It is also known as the Idaho potato in the United States. It has white fluffy flesh and is high in starch. Apparently, this is probably the best substitute for the Yukon Gold Potato. Dutch Cream Potatoes -These are large and waxy with a yellow flesh Sebago – A long oval-shaped potato with white flesh. This potato is also great for roasting, boiling, and frying. It’s a great all-round potato Desiree- This potato has red skin and yellow flesh White potato- Another good all-rounder because white potatoes are also great for boiling, frying, and even microwaving. When I make mashed potatoes at home I usually use the good old White potatoes because they make a nice creamy and fluffy mashed potato. Plus they are always available at my local supermarket. Get Rid Of The Potato Masher As much as I love mashed potatoes, they can be time-consuming to make. I always found the potato masher hard work and also not great when it came to ensuring the potato was creamy and lump-free. So I have ditched the old masher and now I use a handheld mixer. That’s right, forget the old masher use a handheld mixer instead!!. Doing this is SO much easier and takes much less time. I just make sure the potatoes are really well cooked and that I heat up the milk before I add it to the potatoes. The mashed potatoes are always free of lumps and they turn out so creamy and fluffy. Seriously a game-changer when it comes to making easy and creamy mashed potatoes. Of course, you can also use a free-standing mixer. However, this means transferring the ingredients to another bowl and more washing up. If you use a handheld mixer, you can mix the potatoes right in the pot.     Recipe 6 Large potatoes suitable for mashing 1/2 cup cream 1/2 cup milk 100 grams butter Salt and Pepper Instructions Wash, peel, and chop the potatoes Add the potatoes to a large pot of cold water. Don’t forget to add approximately 2 teaspoons of salt. Bring the potatoes to a boil, reduce heat then cook the potatoes until they are quite tender. Drain the potatoes Add the warm to hot cream and milk to the potatoes in the pot along with the butter. Use a handheld mixer to mash/blend the potatoes until they are smooth and creamy. Add salt and pepper to taste. Easy Peasy! Just don’t forget to make sure the milk and the cream are warm to hot before adding. For a healthier version, I also make mashed potatoes using one cup of light milk instead of half cup of cream and half a cup of regular milk. They turn out just as tasty but with a much lower fat content. Other Things You Can Add To The Creamy Mashed Potatoes Roasted garlic Bacon Cream Cheese Chives Green Onion   In case you are looking for more recipes You can find a recipe for a healthy and delicious sweet treat here.    

How To Make Easy and Creamy Mashed Potatoes Read More »